7) Account Testing & Editing
After the customer account has been shelled to BRINKS, the drop down menu found after clicking the BRINKS button on a Customer Record has the following selections:

View/Modify Account
Displays the original 'Create Account' screen.
View Event Histories
Displays a list of events logged against the customer account. (i.e. Error Messages, etc.)
Place Account On/Off Test
Displays the a variety of settings for placing the customer account on test, including Test Categories and duration in hours and/or minutes.
Place Account Out of Service
Provides access for setting the account to 'On Test - Dealer Request'.
Pull Panel
Provides the ability to pull the panel from the customer's account. Check the checkbox and click Save.
View Purchase Info
Displays a history of purchases on the customer's account.
View Credit Request
Displays the results of the credit check for the customer, including the status of the BRINKS Bounce Check.
Click-to-Submit
Enter the eContract ID and CS # (Account Number on the Customer Record in SecurityTrax) and click Save to submit the account for funding.
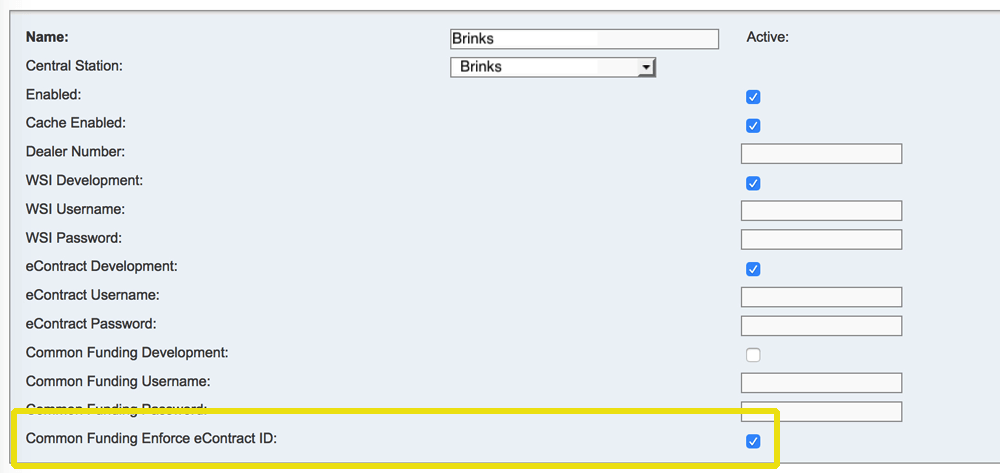
By default, the Contract ID is NOT required in order to submit to BRINKS. This may result in a funding delay. To require the Contract ID for funding:
- Click on the Administration tab
- Click on Monitoring Companies
- Click on the desired BRINKS central station
- Ensure the Common Funding Enforce Contract ID checkbox is checked. (See Image 1)
- Click Save or Save & Stay.
An error will now be displayed if an account is submitted for funding without a Contract ID (See Image 2)

Create eContract
Provides access to generate or re-generate a BRINKS eContract.