Rapid Response
Introduction
Welcome to the Rapid Response information sync. Here you'll find details on how to sync customer records from SecurityTrax to Rapid Response. This is a fairly simple process, and learning it is quick.
The syncing includes the following information: Account information (first name, last name, phone numbers, address, abort code, etc.), Emergency Contact Information (names, phone numbers), Equipment Information (name, zone, zone description), etc.
The process is set up to be a streamlined one-way sync. It happens in real time when pertinent information is saved within SecurityTrax. This allows you to have users perform all of their daily actions in SecurityTrax rather than constantly switching between SecurityTrax and Rapid Response to manually update information when it changes.
The page and its contents are still a work in progress and will likely be updated, so be sure to check back!
Administrative Setup
Before syncing customer records to Rapid Response, you'll need to take care of some administrative items, as outlined below.
Required Steps:
- Obtain Rapid Response credentials includaing a Username, Password, and optionally an Account Number block.
- Open a SecurityTrax ticket, or call SecurityTrax directly to provide these credentials to SecurityTrax.
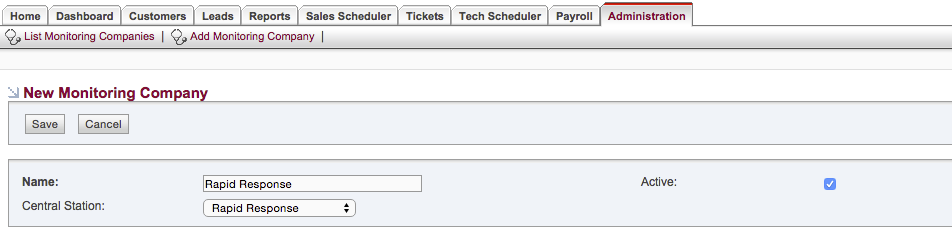
- Within SecurityTrax go to the "Administration" tab and click on the "Monitoring Companies" link, then click on "Add Monitoring Company". Name the company whatever you desire, ensure the "Active" checkbox is checked, and choose "Rapid Response" as the "Central Station" then click "Save".
- Back on the "Administration" tab click on the "Permissions" link then click on the permissions group that you would like to be able to use the Rapid Response integration. On the page that comes up ensure that the "Yes" box is checked on the "Rapid Response" row in the "Customers" section of the page, then click "Save". Repeat this step for every permissions group you would like to have the ability to use the Rapid Response integration.
- Upon receiving confirmation from SecurityTrax that your credentials have been properly input into the system, continue to the next section.

Customer Creation
To start the sync process, you must first create a Customer within SecurityTrax (or convert a Lead to a Customer).
- On the "Customers" tab within SecurityTrax click the "Add Customer" link towards the top of the page.
- Fill out the information on the "New Customer" page as completely as possible.
- Click "Save & Stay".
- From the "Monitored By" dropdown menu, choose the option created in the "Administrative Setup" section above (the Monitoring Company that has "Rapid Response" as the "Central Station"), then click "Save & Stay".
- Either type in an Account Number in the text field next to "Account #" on the customer record, or click the "Request" button to request the next available account number (this button will only be present if you have provided SecurityTrax with an Account Number Block as outlined in the "Administrative Setup" section above) then click "Save & Stay".
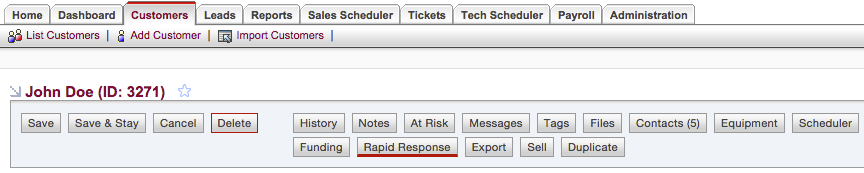
- If you have the proper permissions (see the "Administrative Setup" section above) you will now have a "Rapid Response" button towards the top of the page. Click on this button to open a popup window to begin the sync process.
Syncing
Now that you've created a customer record, you're ready to sync the customer record to Rapid Response.
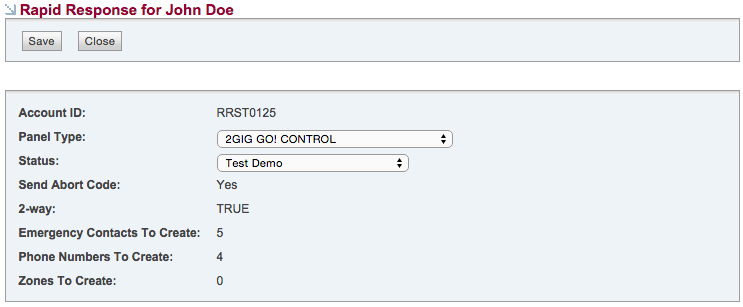
- Review the information in the popup window and verify that all information is correct. Select the "System" from the drop down menu as appropriate, then click "Save".
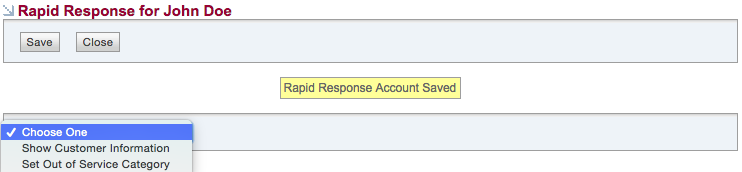
- You should see a success message stating that the account has been saved.
- You are now presented with a dropdown menu to "Show Customer Information". Selecting this option will query Rapid Response for the customer's information, as it resides on Rapid Response's servers, then display that information to you.
Continued Usage
Now that you've created and synced the Customer Record, what happens when you make changes in SecurityTrax?
- Every time you make changes to the Customer Record, the updated information is synced to Rapid Response. For this reason, you may notice a slight delay when accessing/saving a customer record within SecurityTrax that is synced with Rapid Response.
- Information synced includes not only information on the main customer page within SecurityTrax, but information from the "Equipment" popup window on a customer record, as well as information from the "Contacts" popup window.
- **Important** When adding additional equipment to an existing active account it must be marked as installed and a zone number must be assigned or it will not be pushed over to Rapid Response.
Account Maintenance
If you need to make adjustments to the Rapid Response credentials from the "Administrative Setup" section of this document, provide these changes to SecurityTrax as soon as possible, as the integration will cease to function if the credentials are changed/invalidated.