b) Create Account
Multiple tabs found in the BRINKS Dealer Portal have been consolidated to one 'Create Account' screen in SecurityTrax. Below you'll find descriptions of each of the main sections on the 'Create Account' window along with instructions. All values found in the drop-down menus in the 'Create Account' window are provided by BRINKS.
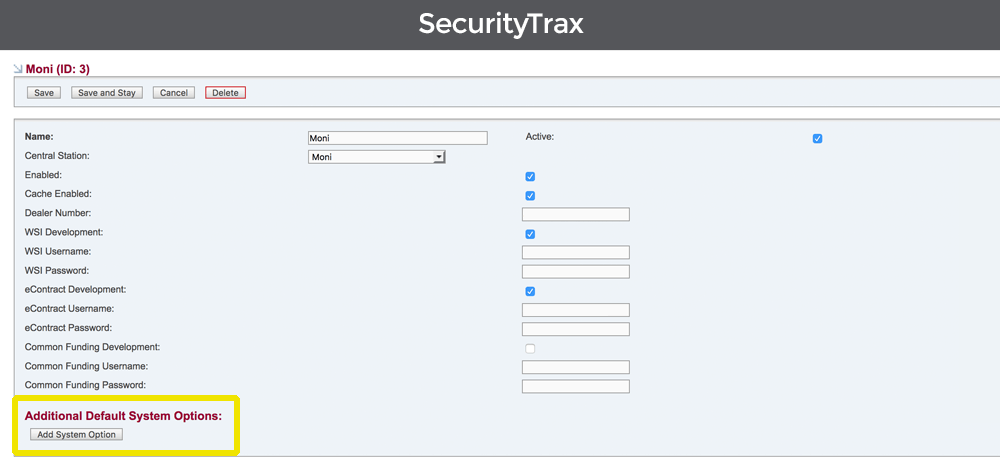
Customer Information
Select the appropriate values from the drop down menus based on the system installed. The CS Number, Receiver Phone, and Site Phone are entered onto the Customer Record in SecurityTrax. You'll need to enter the Panel Phone, Panel Location, and Panel Code in the BRINKS integration. (See Image 1)
Image 1
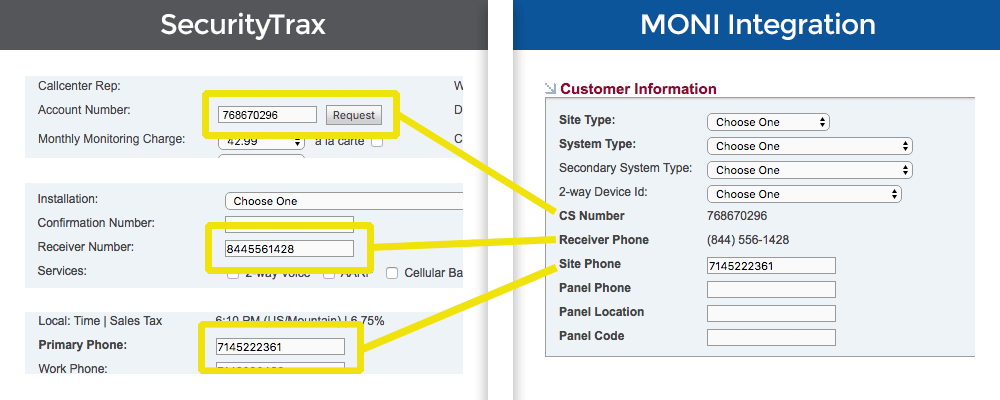
Zones
The Zone ID and Comment are entered in the Equipment button on the Customer Record in SecurityTrax. For easy reference, it's recommended the value entered for the Comment be as close to the options available in the Location drop-down menu provided by BRINKS. (See Image 2)
Image 2
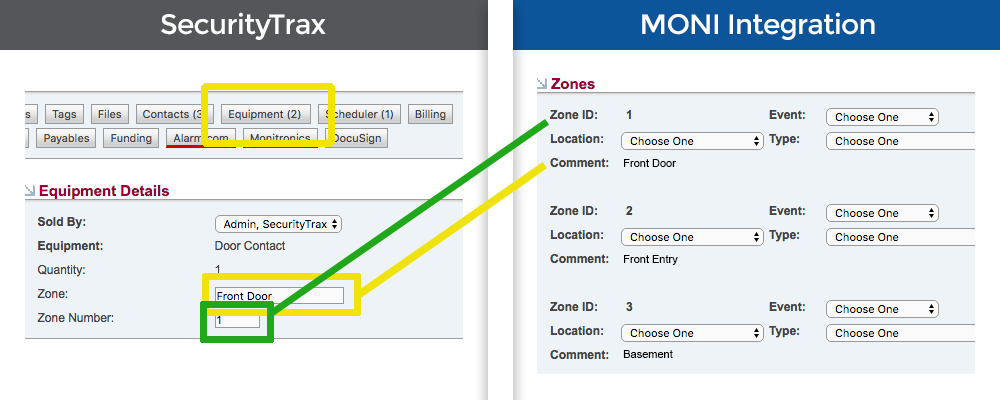
Contacts
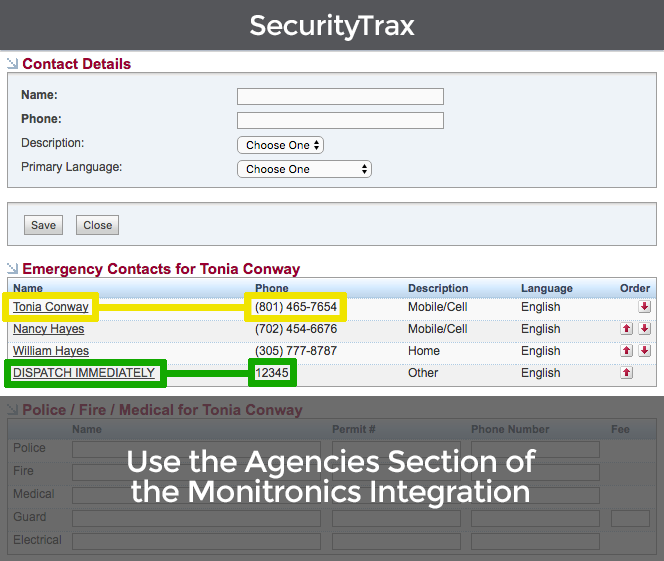
The Name and Phone # are entered in the Contact button on the Customer Record. There must be a separate Contract Signer, Emergency Verification Contact (EVC), and contact with 'Has Key' checked. The 'Cell Primary 1st Contact' checkbox can be checked on any one of the Contacts.
BRINKS requires a 'Duress Code' as an Emergency Contact. Enter 'DISPATCH IMMEDIATELY' for the name and a numerical code as the phone number. SecurityTrax will automatically re-label it as a PIN in the BRINKS Integration. (See Images 3 & 4)
Image 3
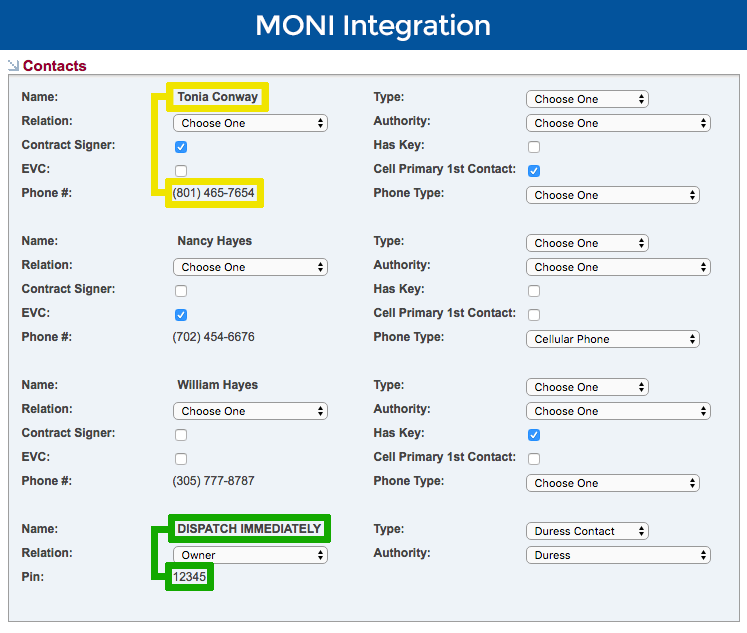
Image 4
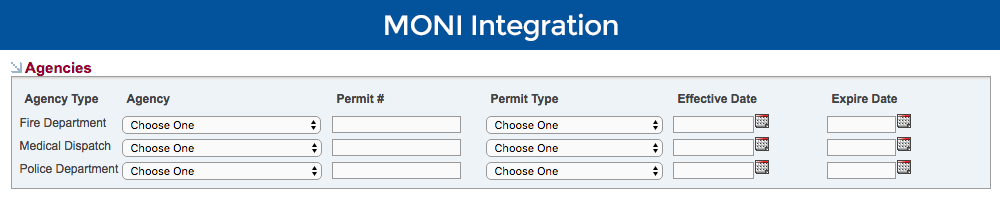
Agencies
Use the Agencies section of the BRINKS integration to select the appropriate authorities. (See Image 5)
Image 5
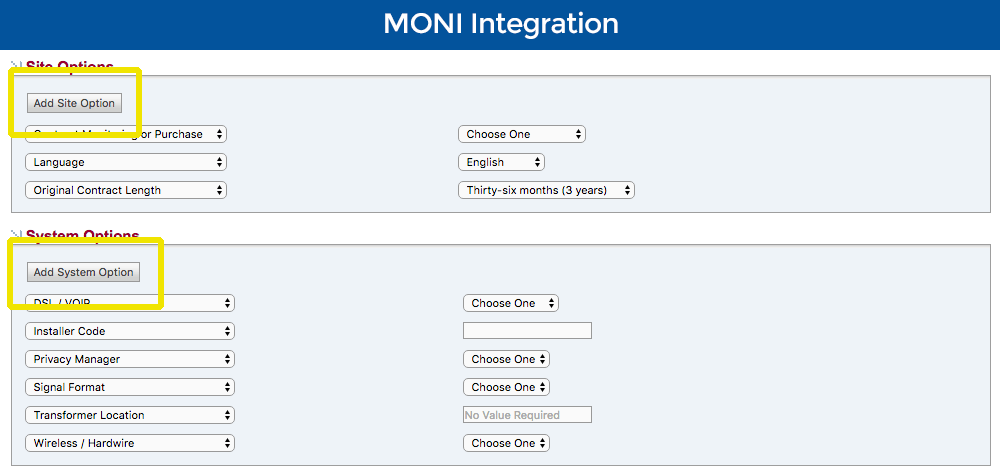
Site & System Options
All of the values in the drop-down menus in this section originate from BRINKS. The items shown by default represent the minimum options required by BRINKS and cannot be removed (i.e. Three default Site Options and six default System Options).
The drop-down menus on the left correlate with the values on the right. Make the applicable selections based on the system being installed then click Save.
Click 'Add Site Option' or 'Add System Option' buttons for additional rows if needed on a customer by customer basis. (See Image 6)
Image 6
If additional default System Options are needed for all customers they can be added by following these steps:
- Click on the Administration tab
- Click on Monitoring Companies
- Click on the desired BRINKS central station
- Click 'Add System Option' and select the desired System Option. Repeat as needed. (See Image 7)
- Click Save or Save & Stay. Next time the BRINKS integration window is displayed the newly added System Options will be included in addition to the original default options.
- Follow these steps for each of your BRINKS central stations created under Monitoring Companies if necessary.
Image 7